
-- GS4 Root and Loki Recovery CWM --
Written By Unknown on Wednesday, June 26, 2013 | Wednesday, June 26, 2013
This Will Install Root & Recovery For Your Qualcomm Based Samsung Galaxy S4
Instructions:-
# Put Your Device In Debugging Mode
# Attach It Via Usb
# Click On Finally Do It Button

Instructions:-
# Put Your Device In Debugging Mode
# Attach It Via Usb
# Click On Finally Do It Button
Update Motorola Xoom WiFi MZ604 To Android Jelly Bean 4.2.1 | AOKP Custom ROM
Written By Unknown on Tuesday, June 25, 2013 | Tuesday, June 25, 2013
yBPy1y97),w~~_35.JPG?set_id=89040003C1)
1. Initially you need to download the AOKP JellyBean 4.2.1 file and extract the zip file to a convenient folder on your PC.
2. Now download Google Apps and extract it to a convenient folder as well.
3. Connect your device to your PC via USB cable.
4. Copy the downloaded file on the internal SD card of your phone.
5. Now turn off your phone and unplug the USB cable.
6. Boot your phone into recovery mode by pressing and holding Volume Up +Home+ Power buttons together until recovery mode screens turns up.
7. Now select ‘ Wipe data/Factory reset ‘ and confirm on the next screen by pressing power button.
8. Now select ‘ Wipe cache ‘ and confirm by pressing power button.
9. Now select ‘ Advanced –> Wipe Dalvik cache ‘ and confirm by pressing power button .
10. Then select ‘ Flash ZIP From SD Card ‘ and then select Choose ZIP From SD Card and browse to the JellyBean 4.2.1 Rom zip file that you copied to your device’s SD card in step 4.
11. Select the file and confirm by pressing power button. The installation will start.
12. Once the installation is finished, install the google apps by following step 1
13. When you finish installing google apps, select ‘ Go back ‘ and select ‘ Reboot system now .
14. Now your device will boot with the whole new Look and feel of Jelly Bean 4.2.1 .
Congratulations !! You have managed to safely update your Motorola Xoom WiFi MZ604 with AOKP 4.2.1 Jelly Bean Custom ROM firmware !
Blackberry 8520 Hang On Blackberry Logo Tested Solution By ..::AzimBahar::..
Written By Unknown on Sunday, June 23, 2013 | Sunday, June 23, 2013
Blackberry 8520 Hang On Blackberry Logo Tested Solution By ..::AzimBahar::..
..::STEP BY STEP::..
HANG ON BLACKBERRY LOGO
Flash/Update Error
..::STEP BY STEP::..
HANG ON BLACKBERRY LOGO

Flash/Update Error
 AFTER FLASH/Update Error You Need Try With This File
 IF Still Then Try Hardware
TESTED HARDWARE SOLUTION
 100% TESTED BY ME
 Here Is the Method How to Repair Wifi After Flash with offical Firmware of I9505

Here is the method to repair Such Problems After Flash with official Firmware of I9505
Need To Download Some Tools and files
Download GT-I9505_AdamKernel.V1.4.CWM.zip
Download openrecovery-twrp-2.5.0.2-jfltexx.tar
Download any Eur Firmware From Sam mobile.com
and Flash demo phone Fst using odia ( in modam.bin software will give you Error Failed ) don,t Worry Its Normal , disconnect cable and do factory Rest From recovery (Phone Will be Power On Normally But Wifi Will Not Work )
Don,t Worry Will be Repair Inshallah
Connect phone in download mode to odia and flash the phone (openrecovery-twrp-2.5.0.2-jfltexx.tar) in PDA tab
2nd step Copy (GT-I9505_AdamKernel.V1.4.CWM.zip) To Phone memory
Boot the Phone in Recovery Mode once again and flash (GT-I9505_AdamKernel.V1.4.CWM.zip) using twrp custom recovery
Done
Restart Phone And Enjoy Wifi Will start Work Once Aagain ,
Thanks goes to Mr.novidadesandroid From Porto Alegre Brasil
LG 920 Flash Tools ,Firmware & Gide
Written By Unknown on Friday, June 21, 2013 | Friday, June 21, 2013

LG SMART FLASH TOOLS
Download Here
This Tools Supported Firmware
Download Here
GIDE
Download Here
This Tools Supported Firmware
Download Here
GIDE
Quote:
|
You need to install LG Mobile drivers. They are located HERE. [CRC MD5: e4614071e72c0292d3a8238908b5c7ba] 1. Unpack SFT.rar that contains SmartFlash Tool program. 2. Unpack, preffered C: drive, firmware pack BIN_LGP970AT-00-V10a-EEU-XXX-MAY-09-2011_0.zip Inside there will be 2 files: LGP970AT-00-V10a-EEU-XXX-MAY-09-2011+0_AP.bin i LGP970AT-00-V10a-EEU-XXX-MAY-09-2011+0_CP.fls. 3. Run B_SmartFlashTool_Extern.exe 4. Choose: 1) ROM copy D/L bookmark 2) in Select mode choose Normal mode 3) choose CP file: LGP970AT-00-V10a-EEU-XXX-MAY-09-2011+0_CP.fls 4) choose AP file: LGP970AT-00-V10a-EEU-XXX-MAY-09-2011+0_AP.bin *) connect phone in S/W Update mode with battery in it (on the phone that is switched off, plug in USB cable WHILE HOLDING Vol+ button) 5) choose COM port. 6) choose LGE Mobile USB Serial Port in Communication Driver 7) click Start and wait till end. It takes about 3 mins to flash. After successfully flashing, phone will reboot and make Factory Reset. And that's all! |

My Problem Solved With After HSPL With 1.93 HSPL
Written By Unknown on Sunday, June 16, 2013 | Sunday, June 16, 2013
My Problem Solved With After HSPL With 1.93 HSPL

Download 1.93 HSPL Link1
English ROM RUU_Diamond_hTC_Asia_HK_WWE_1.93.831.1.exe
For More Flowing The Link
Now Phone Working

Another Way To Recovery
Another Way To Recovery
Before I load This File ADB File By AzimBahar
Unzip The File To Put On And Take All three. c/window/system32. And connect The Cable To Be Ready.
How To Do ........... strat > run> cmd > ok

strat > run> cmd > ok 
Recovery mode can be used with other versions of android it this way. While the eye was quite good client really does not have to press a button to see
Samsung S3850 Successfully flash done with MultiLoader v.5.65
Samsung S3850 Successfully flash done with MultiLoader v.5.65
Download mode - press (Call/Green +volume up + Power )
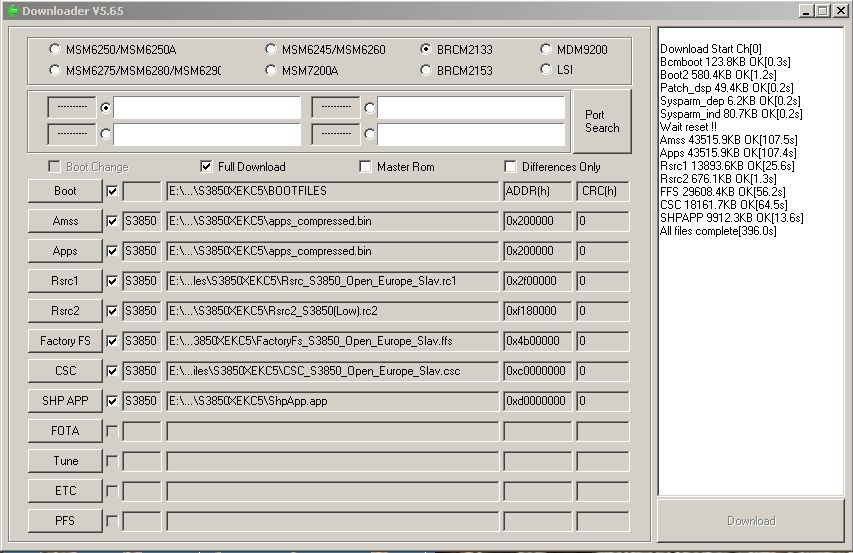
here done logo . . .
Quote:
|
Download Start Ch[0] Amss 43515.9KB OK[107.3s] Rsrc1 13893.6KB OK[25.6s] Rsrc2 676.1KB OK[1.3s] FFS 29608.4KB OK[55.8s] CSC 18161.7KB OK[64.3s] SHPAPP 9912.3KB OK[13.6s] All files complete[274.8s] |
NEW-AndroPlatinaUtilsv2.0 Tool
NEW-AndroPlatinaUtilsv2.0 Tool
All-in-one tool for rooted Android phones


Instructions
All-in-one tool for rooted Android phones
Instructions
Quote:
|
[/QUOTE]
III-Infineon-III Samsung Infineon Free Tools
III-Infineon-III Samsung Infineon Free Tools
Quote:
|
FlashTool_E2 v.2.6 DLL v.2.20 FlashTool_E2 v.2.12 DLL v.2.26 FlashTool_E2 v.4.15.3.13 FlashTool_E2 v.4.32_32Bit.3.13 FlashTool_E2 v.4.41.3.35 FlashTool_E2 v.4.55.3.44 Infineon_Tool V8.1 Flash Loder Utility Driver [Setup] FTDI_Driver |


RESET GMAIL Lock Tools By AzimBahar ( For Test )
RESET GMAIL Lock Tools By AzimBahar ( For Test )
Require - Enable USB Debugging
Download Reset Gmail Rar By AzimBahar
Require - Enable USB Debugging
Download Reset Gmail Rar By AzimBahar

This Tools Works Without Loss Data
Iphone Error Collection With Solution
Errors -9815
Set exact date, restart computer. See also Apple's KB article.
Errors -9814
Set exact date, restart computer. See also Apple's KB article.
Errors -9800
Set exact date, restart computer. See also Apple's KB article.
Error -50
Delete Storm Vedio, QuickTime, iTunes, then reinstall iTunes. See also Apple's KB article.
Error -35
See Apple's KB article.
Error 1
Unable to downgrade. Try changing the USB port (the back one of chassis is better) and restart computer.
The installed version of iTunes may also be too old. Update iTunes.
Error 2
Sn0wbreeze 1.6 Custom Firmware has a ASR patch problem. Use sn0wbreeze 1.7 or PwnageTool. Device isn't bootable.
Error 6
Not enter the downgrading mode, change USB port (the back one of chassis is better) and restart computer.
Error 9 Searching correct fault.
Error 10[/COLOR][/B]
LLB is missing from the IPSW. The device cannot be booted up. The trick to skip the baseband update no longer works.
Error 11
Removed bbfw file in the firmware folder of an unzipped IPSW.
Error 13
Occurs when you want to install a beta firmware with iTunes for Windows (actively blocked by Apple; beta users are developers and therefore must have a Mac).
Error 13 may also signify a USB problem. Check the USB connection and try other direct ports or maybe the USB cable is an older one. Device isn't bootable.
Error 14
Custom firmware update fail (PwnageTool). You have to restore the device with a custom firmware. Update to a custom firmware isn't working. Device isn't bootable. 2
USB Problem. Check the USB connection and try other direct ports or maybe the USB cable is an older one. Device isn't bootable.
Error 17
Custom firmware update fail (sn0wbreeze). You have to restore the device with a custom firmware. Update to a custom firmware isn't working. 2
Error 20 Searching correct fault.
Error 23
Baseband Communication error (Hardware), Most probably Baseband chip is faulty.
Error 26
False version of the NOR flash firmware. Use the correct sn0wbreeze version.
Error 28
Searching correct fault.
Error 29
See Apple discussions thread about this problem.
Error 37
iPod touch 2G LLB patched with the 0x24000 Segment Overflow was used on an iPhone 3GS custom firmware. Known on damaged bundles from unofficial PwnageTool distributions or bundles.
Error 1002
Are you restoring to a stock apple firmware or a custom pwn firmware? Either way make sure you are in DFU mode first.
Error 1004
This is caused by a failure to match the Baseband Nonce currently in memory to the Nonce returned in the BasebandFirmware SHSH blob. This is a normal part of iPhone 4 local restores via TinyUmbrella. 1
Error 1013
Restart computer; change computer; reinstall system, if iPhone is always in restoring mode: XP users can jump from restoring mode with ibus; MAC users can use iNdependence. (usually on the iPhone with 1.0.2 firmware downgraded from 1.1.1)
Error 1014
This error is down to itunes not liking your USB ports on your computer. Use a different USB slot or a different computer if possible. That is the easiest fix!
Error 1015
Restart computer; change computer; reinstall system, if iPhone is always in restoring mode: XP users can jump from restoring mode with ibus; MAC users can use iNdependence. (usually on the iPhone with 1.1.1 firmware downgraded from 1.1.2) Baseband firmware on the IPSW is higher than the baseband firmware on the iPad/iPhone. 1
Error 1413
Restart computer; change USB port; reinstall system. See also Apple's KB article.
Error 1415
Restart computer; change USB port; reinstall system.
Error 1417
Restart computer; change USB port; reinstall system.
Error 1418
Restart computer; change USB port; reinstall system.
Error 1428
Restart computer; change USB port; reinstall system.
Error 1600
Custom firmware can't be restored on a device with DFU Mode. Use Recovery Mode.
Error 1602
Restart computer; change computer; reinstall system.
Error 1603
False kernelcache patch. Known on damaged bundles from unofficial PwnageTool distributions or bundles. See also Apple KB article
Error 1604
Device was not pwned (signature checks were not blocked). Custom firmware can't be restored.
Error 1611
iTunes tried to enter the Restore Mode, but the device turned back to the Recovery Mode.
Error 1619
iTunes is too old and couldn't read the iPhone in Recovery or DFU Mode. Please update iTunes and try it again.
Error 1644
IPSW was moved during prepare with iTunes. Try it again and don't move the IPSW.
Error 2002
iTunes can't connect because another program is using it or it's disconnected during the Apple Server check.
Error 3XXX
iTunes can't connect to gs.apple.com. Maybe Port 80 and Port 443 is blocked. Open it on your router.
Error 3002
Update to an older firmware isn't working, because Apple is no longer handing out SHSHs for the device/firmware combination.
Error 3004
No internet connection during the firmware restore.
Error 3014
False edited hosts. The SHSH request couldn't be completed. No connection to the Apple Server, Sauriks Server or localhost.
Error 3194
Occurs when trying to install an old firmware and Apple's server disallows the installation. The only solution is to have SHSH backup and modify the hosts file to point to Saurik's Cydia server where they are backed up (or localhost if you have it yourself).
Error 3195
"An internal error occurred." Missing SHSH for the firmware. Maybe the same as "This device isn't eligible for the request build." but with an cache error.
Error 11222
internet options Connections tab Click LAN Settings uncheck "use a proxy server"
0xE8000022 Searching..........
0xE800003D
False permissions in the Carrier Bundle folder. Restore, update or fix the permissions from the carrier bundle to update the carrier settings via iTunes.
0xE800006B
Device was suddenly unplugged. iTunes couldn't connect with the device. Try it again.
0xE8000065
sn0wbreeze custom cirmware error on USB connection. Unplug the device, reboot it, and plug it in again.
Please Note : If there anything i missed just make ur comment.
Hard reset LG P350 Optimus ME full reset
Written By Unknown on Thursday, June 13, 2013 | Thursday, June 13, 2013
WARNING: All of your data will be lost!
If user turns on the phone by pressing and holding End Key + Send Key + Down volume key at the same time (for 10
seconds), the phone will turn on and perform hard reset immediately.
Please note, after you perform the Hard Reset, all your data and applications on your phone
will be erased and cannot be reversed.

Turn off your phone and reboot. While your phone is powering back on, press and hold the Send key while the
Android Logo is displayed.
Your P350 phone will boot all the way to the main screen and display "safe mode" in the lower left-hand corner.
Samsung i997 Infuse 4G hard reset
Press and hold VOLUME UP + DOWN + POWER on i997, release only POWER key, but keep pressing VOL +/- for 8 sec., in recovery menu (Vol DOWN to highlight, POWER key to select) then select Delete all user data.

or Tap Applications ➔ Settings ➔ Location and security. Tap Clear storage.
Infuse 4G Safe mode
1. Make sure your phone is turned off.
2. Press and hold the power key to boot up your device.
3. After the “Rethink Possible” letters change from blue to black, continually tap the MENU
 key.
key.When the Home screen is displayed, Safe mode is displayed in the lower left corner of the screen.
Apple iPhone 3G hard reset
Apple iPhone 3G hard reset
If iPhone 3G won’t turn on, or if the display freezes or doesn’t respond
- Press and hold the Home button below the screen for at least six seconds, until the application you were using quits.
- If that doesn’t work, turn iPhone 3G off and turn it on again. Press and hold the Sleep/ Wake button on top of iPhone for a few seconds until a red slider appears, and then drag the slider. Then press and hold the Sleep/Wake button until the Apple logo appears.
- If that doesn’t work, reset iPhone 3G. Press and hold both the Sleep/Wake button and the Home button for at least ten seconds, until the Apple logo appears.

Updating and Restoring iPhone
Software
You can use iTunes to update or restore iPhone 3G software. You should always update iPhone to use the latest software. You can also restore the software, which returns iPhone to its original state.
If you restore, all data is erased from iPhone 3G, including songs, videos, contacts, photos, calendar information, and any other data. All iPhone settings are restored to their original state.
Resetting iPhone Settings
Reset all settings
Choose General > Reset and tap Reset All Settings.
Choose General > Reset and tap “Erase All Content and Settings.”
Choose General > Reset and tap Reset Keyboard Dictionary.
Choose General > Reset and tap Reset Network Settings.
You can use iTunes to update or restore iPhone 3G software. You should always update iPhone to use the latest software. You can also restore the software, which returns iPhone to its original state.
If you restore, all data is erased from iPhone 3G, including songs, videos, contacts, photos, calendar information, and any other data. All iPhone settings are restored to their original state.
- Make sure you have an Internet connection and have installed the latest version of iTunes from www.apple.com/itunes.
- Connect iPhone 3G to your computer.
- In iTunes, select iPhone in the Source pane and click the Summary tab.
- Click “Check for Update.” iTunes tells you if there’s a newer version of the iPhone software available.
- Click Update to install the latest version of the software. Or click Restore to restore iPhone 3G to its original settings and erase all data on iPhone. Follow the onscreen instructions to complete the restore process.
Resetting iPhone Settings
Reset all settings
Choose General > Reset and tap Reset All Settings.
- All your preferences and settings are reset. Information, such as your contacts and calendars, and media, such as your songs and videos, are not deleted.
Choose General > Reset and tap “Erase All Content and Settings.”
- All your information and media are deleted. You must sync iPhone with your computer to restore contacts, songs, videos, and other information and media.
Choose General > Reset and tap Reset Keyboard Dictionary.
- You add words to the keyboard dictionary by rejecting words iPhone suggests as you type. Tap a word to reject the correction and add the word to the keyboard dictionary. Resetting the keyboard dictionary erases all words you’ve added.
Choose General > Reset and tap Reset Network Settings.
Apple iPhone DFU mode ( Deep Firmware Upgrade)
1. Turn off iPhone.
2. Connect to mac/pc with sync cable / iTunes.
3. Press and hold HOME and POWER buttons for 10sec.
4. Release only POWER button, but continue pressing HOME button for 10 sec.
2. Connect to mac/pc with sync cable / iTunes.
3. Press and hold HOME and POWER buttons for 10sec.
4. Release only POWER button, but continue pressing HOME button for 10 sec.
Now iTunes should detect iPhone in recovery mode.
Samsung galaxy mini GT-S5570I Hard Reset
See Video and get google pattern unlock
Samsung GT-S5570I
Thanks for Watching Site.
Windows 7 USB/DVD Download Tool
Written By Unknown on Wednesday, June 12, 2013 | Wednesday, June 12, 2013

Windows 7 USB/DVD Download Tool
How to Get and Use the Windows 7 USB/DVD Download Tool
How to Get and Use the Windows 7 USB/DVD Download Tool
Introduction
If
you would like to burn your downloaded or converted .iso image to a DVD
or create a bootable USB flash drive, this free Microsoft utility is
for you.
In very little time this can be accomplished by even a novice, and in this tutorial I'm gonna show you how. I have seperated this tutorial into 2 sections: Part 1 covers how to burn a bootable DVD and Part 2 is on creating a bootable flash drive.
This is primarily going to be useful to XP and Vista users who do not have .iso burning software installed on their current HDD and wish to perform a clean install.
The Windows 7 USB/DVD Download Tool does not support using Windows XP .iso files.
If you do not have a Windows 7 with SP1 ISO, then you can download the latest official Windows 7 with SP1 ISO file here:
Microsoft: Windows 7 Direct Download Links
If you do not have a Windows 7 with SP1 ISO, then you can download the latest official Windows 7 with SP1 ISO file here:
Microsoft: Windows 7 Direct Download Links
The Windows 7 USB/DVD Download Tool does not work with UEFI.
To create a 64-bit Windows 7 or Windows 8 UEFI USB flash drive, see:
How to Create a Bootable UEFI USB Flash Drive for Installing Windows 7 and Windows 8
To create a 64-bit Windows 7 or Windows 8 UEFI USB flash drive, see:
How to Create a Bootable UEFI USB Flash Drive for Installing Windows 7 and Windows 8
Here's How:
First visit the MS Store Website and download and run the installer.
Or just click on this easy to use button --->


After you have successfully downloaded and installed the Windows 7 USB/DVD Download Tool, you should see its icon on your desktop. Double click to start the program.
PART 1 - How to Burn a bootable Windows 7 DVD
1) After you launch the app, you will see the Step 1 of 4 dialog box. Here you will navigate to the location of your .iso file by clicking the Browse button. Once you have successfully located your iso file click Next to continue to step 2.
2) In step 2 of 4 you are given the choice of making a bootable DVD or a bootable USB flash. In this first section of my tutorial I show you how to burn a bootable DVD. So click DVD if that is what you want.

3) Make sure you have a blank DVD in your optical drive, or you may see this message.

4) Once you have inserted a blank DVD you will see the folowing screen, click Begin burning to continue.

5) Once the burn starts, you should see the progress bar here at Step 4 of 4. Remember the amount of time it takes to complete the burn depends on many factors... be patient.

6) If all you wanted was a bootable DVD, you are finished when you see the image below, close the program or start over if you wish to make a 2nd copy.

PART 2 - How to create a bootable Windows 7 USB Flash Drive

You
need a USB flash drive with at least 4GB of free space, and the flash
drive will be formattted to NTFS! So backup your data before creating
this bootable USB, or you will lose all your data!
Follow the instructions in the Introduction at the beginning of tutorial and download and install the tool. The installation will add the program shortcut to your desktop, just double click to start.
1) After you launch the app, you will see the Step 1 of 4 dialog box. Here you will navigate to the location of your .iso file by clicking the Browse button. Once you have successfully located your iso file click Next to continue to step 2.
2) In step 2 of 4 you are given the choice of making a bootable DVD or a bootable USB flash. Here in Part 2 of my tutorial I show you how to create a bootable USB Flash Drive. So click USB device if that is what you want.
3) Here in step 3 of 4 you will select the USB flash drive of your choice by using the drop down list arrow. Once you have chosen the correct Drive, click the Begin copying button.
4) Here in step 4 of 4: Creating bootable USB device, you should see the progress bar move across the screen. As always your speed depends on many factors, have patience!


5) Once completed you should see the following dialog box.

I found it interesting that the USB device icon in "Computer" now looks identical to that of the DVD!

Here are the contents of the USB device after completion...

I hope this helps out some of you who are "stuck" when it comes to burning an iso to DVD or creating a bootable USB device.

Thanks!
Boot from a VHD using Windows 7

Boot from a VHD using Windows 7
How to Boot from a VHD using Windows 7 and Windows 8
How to Boot from a VHD using Windows 7 and
Windows 8
Windows
7 and Windows 8 includes support for creating, mounting and booting
from VHD images but not many seem to know how to use this functionality
to boot VHDs at boot time... I will detail the steps required to have
another OS bootable using Windows 7...
This tutorial will show you how to setup Windows 7 or Windows 8 to boot from an existing VHD (Virtual Hard Disk).
All Vista, Windows 7, and Windows 8 (except Windows 8 RT) editions support booting from a VHD.
You must have either Windows 7 Ultimate, Windows 7 Enterprise, Windows 8 Pro, or Windows 8 Enterprise installed on the VHD to be able to boot from the VHD.
If
you do not have a good knowledge of how to reset your VirtualOS
configuration like HAL type and driver configuration then your VHD will
fail to boot. It must be cleaned of VirtualOS configuration correctly
before Windows can boot your VHD!!
Step 1: If you have not already, create or attach an existing a VHD using the tutorial below.Virtual Hard Disk - Create and Attach VHDStep 2: Open an elevated command prompt.
Step 3: Copy and Paste this command below and press Enter.
NOTE: Substitute VHD_Boot in the command below for what you want to be displayed as the name in Windows Boot Manager.bcdedit /copy {current} /d "VHD_Boot"
If the command succeeds, BCDEdit displays a message similar to the following:
The entry was successfully copied to {CLSID_Number}
Step 4: Then type this command below and press Enter.Take note of the CLSID number as you will need this during the next step
NOTE: Substitute C with the drive letter your VHD is on, and substitute disk1 with the name of your VHD file.bcdedit /set {CLSID_Number} osdevice vhd=[C:]\disk1.vhd
Step 5: Thats it, You can now boot VHDs using Windows 7
To confirm the settings simply type bcdedit


If your VHD is configured correctly You can reboot and select the extra boot-option to boot from your VHD

VirtualPC VHDs can not be used
for booting with Windows because VirtualPC uses a Pentium 3 HAL and
this prevents them from being used as boot media, You can however use
this Tutorial: Virtual Hard Disk - Create and Attach VHD and create then mount a VHD for use with VMWare Workstation....
You
simply set VMWare workstation to use a Physical Disk, you can then
Install a separate OS onto this mounted VHD for use with Windows.
You
Must reset your VHD VirtualOS configuration like HAL type and driver
configuration or your VHD will fail to boot!!! It must be cleaned of
VirtualOS configuration correctly before windows 7 can boot your VHD!! 
There
are still many bugs associated with VHD booting with Windows 7 at this
time, I suspect Microsoft will be releasing a new Version of VirtualPC
that's able to manage this entire process of creating, installing and
booting separate VHDs at boot-time easily and without so many problems


